
Hardware techniques form the foundation of every successful computer build and repair project. Whether someone is assembling their first PC or maintaining enterprise-level servers, understanding these methods saves time, money, and frustration.
This guide covers the essential hardware techniques that professionals and enthusiasts rely on daily. Readers will learn about core components, proper assembly procedures, troubleshooting methods, and maintenance strategies. Each section delivers practical knowledge that applies to real-world scenarios.
The difference between a system that runs smoothly for years and one that fails prematurely often comes down to technique. Small details, like proper thermal paste application or correct cable management, compound into significant performance differences over time.
Table of Contents
ToggleKey Takeaways
- Mastering hardware techniques like proper thermal paste application and cable management significantly impacts system performance and longevity.
- Always ground yourself with an anti-static wrist strap before handling components to prevent static electricity damage.
- When troubleshooting a system that won’t POST, reseat RAM modules and listen for beep codes to identify specific failures.
- Clean dust from heatsinks and fans every three to six months to prevent overheating and maintain optimal airflow.
- Replace thermal paste every two to three years to ensure efficient heat transfer between the CPU and cooler.
- Protect your investment with surge protectors and UPS devices to guard against power-related hardware damage.
Understanding Core Hardware Components
Every computer system relies on a set of fundamental components working together. Mastering hardware techniques starts with knowing what each part does and how they interact.
The CPU (Central Processing Unit) serves as the brain of any system. It processes instructions and performs calculations. Modern CPUs from Intel and AMD contain billions of transistors and generate significant heat during operation. Understanding thermal design power (TDP) ratings helps builders select appropriate cooling solutions.
RAM (Random Access Memory) provides temporary storage for active programs and data. DDR5 memory now dominates new builds, offering faster speeds and improved power efficiency compared to DDR4. Hardware techniques for RAM installation include checking motherboard compatibility and ensuring modules seat firmly in their slots.
Storage drives come in two main types: solid-state drives (SSDs) and hard disk drives (HDDs). SSDs use flash memory and deliver faster read/write speeds. HDDs use spinning platters and offer more storage per dollar. Many builders combine both types for optimal price-to-performance ratios.
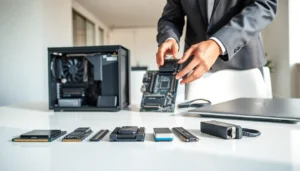
The motherboard connects all components and provides essential features like USB ports, audio outputs, and expansion slots. Selecting the right motherboard requires matching the socket type to the chosen CPU and confirming support for desired RAM speeds.
Power supply units (PSUs) convert AC power from wall outlets to DC power for components. Wattage requirements depend on the total system draw, with graphics cards often consuming the most power. Quality PSUs include protections against surges, shorts, and overloads.
Graphics cards handle visual processing tasks. Dedicated GPUs from NVIDIA and AMD accelerate gaming, video editing, and machine learning workloads. Integrated graphics built into some CPUs handle basic display tasks adequately.
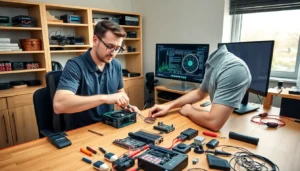
Assembly and Installation Best Practices
Proper assembly techniques prevent damage and ensure optimal performance. Following established procedures makes the difference between a stable system and one plagued by issues.
Workspace Preparation
Static electricity destroys electronic components. Before handling any hardware, builders should ground themselves using an anti-static wrist strap connected to a metal surface. Working on a non-conductive surface like wood or an anti-static mat adds another layer of protection.
Good lighting makes a significant difference. Small screws, tiny pins, and fine print on components require clear visibility. A headlamp or adjustable desk lamp helps illuminate work areas effectively.
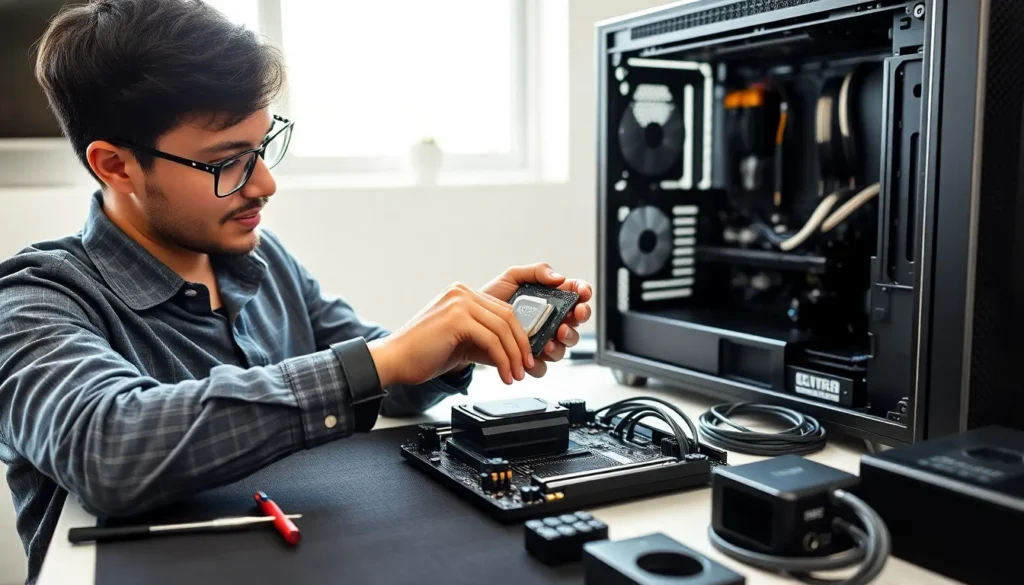
CPU Installation
CPU installation demands careful attention. The processor has a specific orientation marked by a triangle or notch that matches a corresponding indicator on the motherboard socket. Forcing a CPU into the wrong position bends pins and causes permanent damage.
Applying thermal paste correctly affects cooling performance dramatically. A pea-sized amount in the center of the CPU spreads evenly when the cooler applies pressure. Too much paste creates a mess and can actually insulate rather than transfer heat.
Memory and Storage Installation
RAM modules click into place when properly seated. The notch on each stick aligns with the key in the slot. Most motherboards color-code slots to indicate optimal configurations for dual-channel operation.
M.2 SSDs insert at an angle and then lay flat against the motherboard. A small screw secures the drive in place. SATA drives connect via data and power cables routed from the motherboard and PSU respectively.
Cable Management
Clean cable routing improves airflow and makes future upgrades easier. Routing cables behind the motherboard tray keeps the main chamber clear. Velcro straps or zip ties bundle excess cable length neatly.
Troubleshooting Common Hardware Issues
Even with perfect assembly, hardware problems occur. Effective troubleshooting techniques isolate issues quickly and minimize downtime.
No Power or No POST
A system that won’t turn on often has a simple cause. Check that the power switch on the PSU is in the “on” position. Verify the wall outlet works by testing another device. Confirm the 24-pin motherboard power connector and CPU power connector are fully seated.
If fans spin but nothing appears on screen, the system fails to POST (Power-On Self-Test). Reseating RAM often solves this issue. Try booting with only one stick in the primary slot. Listen for beep codes that indicate specific failures.
Overheating Problems
High temperatures cause throttling, crashes, and reduced component lifespan. Monitoring software like HWiNFO displays real-time temperatures. CPUs typically shouldn’t exceed 85°C under load, though specific limits vary by model.
Common causes of overheating include:
- Dried or improperly applied thermal paste
- Dust buildup on heatsinks and fans
- Inadequate case airflow
- Failed or disconnected cooling fans
Reapplying thermal paste and cleaning dust often restores normal temperatures. Hardware techniques for thermal management include adding case fans and optimizing fan curves in BIOS.
Storage Detection Failures
Drives that don’t appear in BIOS require basic checks first. Confirm power and data cables connect securely. Try different SATA ports or cables to rule out connection issues. For M.2 drives, verify the slot supports the drive’s interface type (NVMe vs. SATA).
Random Crashes and Blue Screens
Intermittent crashes often point to memory problems. Windows Memory Diagnostic or MemTest86 identifies faulty RAM. Unstable overclocks also cause crashes, returning settings to default isolates this variable.
Maintenance Strategies for Longevity
Regular maintenance extends hardware lifespan and maintains performance. Neglected systems accumulate problems that become expensive to fix.
Dust Management
Dust acts as an insulator and clogs airflow paths. Cleaning every three to six months keeps systems running cool. Compressed air blows dust from heatsinks, fans, and filters. Positive case pressure, more intake than exhaust, reduces dust accumulation by preventing unfiltered air from entering through cracks.
Thermal Paste Replacement
Thermal paste degrades over time. Replacing it every two to three years maintains optimal heat transfer between the CPU and cooler. The process involves removing the cooler, cleaning old paste with isopropyl alcohol, applying fresh paste, and reinstalling the cooler.
Firmware and Driver Updates
BIOS updates fix bugs and add support for new hardware. GPU driver updates improve game compatibility and performance. Checking manufacturer websites quarterly ensures systems benefit from the latest improvements. But, the “if it ain’t broke, don’t fix it” principle applies, stable systems don’t always need the newest updates.
Backup and Monitoring
Drives fail eventually. Regular backups to external drives or cloud storage protect important data. S.M.A.R.T. monitoring tools like CrystalDiskInfo provide early warning signs of drive degradation. Replacing drives showing warning signs prevents data loss.
Power Protection
Surge protectors guard against voltage spikes from lightning and grid fluctuations. Uninterruptible power supplies (UPS) provide battery backup during outages, allowing safe shutdowns. These devices cost far less than replacing damaged components.